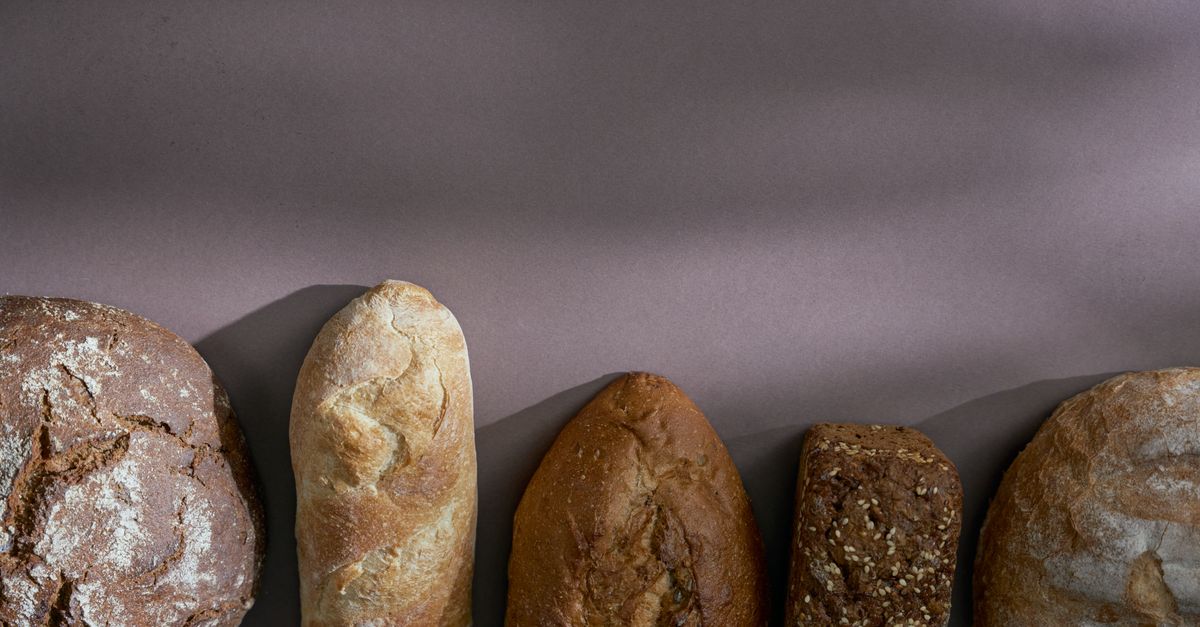
Why Your Homemade Bread Isn't Crusty (And The Pro-Secrets That Deliver Bakery-Quality Crunch Every Time)
Picture this: You spend hours kneading, waiting for the perfect proof, the aroma of fresh bread filling your kitchen, promising that artisanal experience. Then, it comes out of the oven. It looks beautiful, a rich golden brown. But when you slice into it, instead of that satisfying, almost audible shatter of a truly great crust, you get… a gentle sigh. A soft, yielding exterior that tastes good, sure, but lacks that professional crunch you crave.
I’ve been there more times than I care to admit. For years, my homemade loaves were delicious inside, but their crusts were perpetually underwhelming – chewy, sometimes leathery, but never truly crisp. I tried different recipes, varied kneading times, and even experimented with different flours. It wasn’t until I started delving into the science behind bakery bread that I realized my assumptions about crust development were entirely off. It’s not just about the recipe; it’s about creating the right environment, understanding moisture, and employing a few simple techniques that professional bakers use every day. What changed everything for me was realizing that a great crust isn’t an accident; it’s the result of intentional choices throughout the entire baking process, especially in the oven.
Key Takeaways
- Achieve a truly crisp crust by prioritizing steam in the initial baking phase, which keeps the surface pliable for maximum expansion before firming up.
- Avoid dense, soft crusts by ensuring your dough is properly hydrated and developed to allow for optimal oven spring and aeration.
- Control the external environment during baking by using a Dutch oven or a pan of water to create the necessary steam for an excellent crust.
- Finish with a dry, high-heat bake after the initial steam phase to drive off residual moisture and encourage deep browning and crispness.
The Overlooked Role of Steam: Why Your Oven Needs a Spa Day
The single biggest mistake I see home bakers make, and one I made for years, is underestimating the power of steam. When you put dough into a hot oven, the yeast gets a final burst of activity, causing the dough to expand rapidly – this is called “oven spring.” If your oven environment is dry, the surface of your dough will set almost instantly into a firm skin. This stiff outer layer restricts the dough’s ability to fully expand, leading to a denser crumb and, crucially, a soft, thick crust instead of a thin, crispy one.
Think of it like this: If you try to blow up a balloon with a dried-out, stiff surface, it’s going to be much harder than one that’s flexible. Steam keeps the surface of your dough moist and elastic for the first 15-20 minutes of baking. This allows the dough to achieve its maximum oven spring, letting the internal structure fully develop. As the dough expands, its surface stretches thinner and thinner. Once the steam dissipates, this now-thin, stretched surface is perfectly primed to dry out and crisp up when exposed to direct dry heat.
Actionable Insight: Invest in a Dutch oven. This is, hands down, the easiest and most effective way to create a steamy environment for your bread. Preheat your Dutch oven with the lid on to 450-500°F (230-260°C). Carefully transfer your dough into the hot Dutch oven, put the lid back on, and bake for the first 20-25 minutes with the lid on. The trapped moisture from the dough itself creates an ideal steam bath. If you don’t have a Dutch oven, you can place a pan of boiling water on the bottom rack of your oven for the first 15 minutes of baking, or even spray the oven walls with water (carefully!) a few times in the first 10 minutes.
Hydration is Key: Don’t Starve Your Dough of Water
Many beginner bread recipes, in an effort to be less intimidating, call for lower hydration levels (less water relative to flour). While easier to handle, lower hydration doughs tend to produce a denser crumb and a thicker, chewier crust. A higher hydration dough (think 70-80% water to flour ratio) feels stickier and is more challenging to work with, but it has several advantages for crust development.
Firstly, more water in the dough means more steam will be released from the dough itself during baking, contributing to that crucial initial steamy environment. Secondly, a more hydrated dough allows for a more open crumb structure. This internal aeration is important because a well-aerated crumb allows moisture to escape more readily from the interior of the loaf during the drying phase, preventing it from migrating back into the crust and making it soggy after it cools.
Actionable Insight: Gradually increase your dough’s hydration. If your current recipe uses, say, 60% hydration, try adding an extra 5-10% water (e.g., for 500g flour, if you use 300g water, try 325g or 350g). You’ll need to adjust your kneading technique (stretch and folds are often better for high-hydration doughs than traditional kneading) and potentially your proofing times, but the difference in crust texture and crumb openness is remarkable. Don’t jump from 60% to 80% overnight; make small, incremental changes until you find a hydration level you’re comfortable handling and that gives you the results you want.
The Maillard Reaction and Caramelization: Why Color Matters
A truly crisp crust isn’t just about texture; it’s also about flavor and color. Those deep golden-brown, almost mahogany tones aren’t just for aesthetics; they’re the result of the Maillard reaction and caramelization, chemical processes that happen when sugars and amino acids in the dough are exposed to high heat. These reactions create hundreds of new flavor compounds, giving the crust that complex, nutty, slightly sweet taste that’s characteristic of artisan bread.
If your bread comes out pale, it likely hasn’t spent enough time at a high enough temperature. A pale crust will almost always be soft and lacking in flavor. The high heat, particularly towards the end of the bake, is what drives off remaining moisture and encourages these flavor-building reactions to occur fully.
Actionable Insight: Don’t be afraid of color. After your initial steam phase (e.g., lid off the Dutch oven, or removing the water pan), continue baking at a high temperature (425-450°F / 220-230°C) until the crust is a deep, rich brown. I often bake my loaves for an additional 20-30 minutes after removing the lid, sometimes even longer, rotating the loaf halfway through for even browning. If you’re concerned about burning the bottom, place a baking sheet on the rack below the bread to shield it from direct heat.
Cooling: The Final Frontier of Crispness
This might seem counter-intuitive, but how you cool your bread is just as critical for a crisp crust as how you bake it. When bread comes out of the oven, it’s still undergoing a lot of internal changes. The internal temperature of the loaf is still very high, and moisture is still moving from the hotter interior towards the cooler exterior. If you immediately place your hot loaf on a solid surface, that migrating moisture gets trapped against the surface, condensing and making the bottom and sides of your crust soggy and soft.
This is why so many people get a great crust out of the oven, only for it to soften significantly as it cools. The process of the crust drying out and firming up actually continues during cooling as internal moisture equilibrates and escapes.
Actionable Insight: Always cool your bread on a wire rack. This allows air to circulate completely around the loaf, preventing moisture from getting trapped and ensuring an even cooling. Resist the urge to slice into your bread too early, no matter how tempting that fresh-baked aroma is. I’ve found that waiting at least 1-2 hours (and sometimes longer for larger loaves) for the bread to cool completely results in the best crust and crumb texture. Slicing too early traps steam inside the loaf, which then softens the crumb and the remaining crust.
The Overlooked Power of a Baking Stone or Steel
While a Dutch oven is excellent for trapping steam, a preheated baking stone or steel plays a vital role in providing a consistent, high heat to the bottom of your loaf. When dough is placed directly onto a preheated stone or steel, it receives an immediate and intense burst of heat from the bottom up. This rapid heat transfer contributes to a better oven spring and helps to quickly set the bottom crust, preventing it from becoming thick and doughy.
Without this direct radiant heat, the bottom of your loaf might cook more slowly, leading to a less developed, softer crust on the underside. A stone or steel acts as a thermal mass, storing and radiating heat evenly, which is particularly beneficial if you’re baking larger loaves directly on a baking sheet, even with steam. It ensures that every part of your crust experiences the intense heat it needs for optimal development.
Actionable Insight: If you bake bread regularly and don’t use a Dutch oven for every loaf, consider investing in a baking stone or steel. Preheat it in your oven for at least 30-60 minutes at your desired baking temperature (usually 450-500°F / 230-260°C) before carefully transferring your dough onto it. Use a pizza peel or parchment paper to slide the dough onto the hot surface. This consistent bottom heat, combined with a steam strategy, will elevate your crust game significantly.
The Unsung Hero: Flour Choice and Dough Development
Finally, don’t underestimate the foundational elements: your flour and how you develop the dough. While not directly about the baking environment, these factors lay the groundwork for a good crust. Flours with higher protein content (like bread flour) develop stronger gluten networks. A strong gluten network allows the dough to capture more gas during fermentation and hold its structure better during oven spring. This results in a more open, airy crumb, which, as we discussed, facilitates better moisture release and a crisper crust.
Beyond flour, proper dough development (kneading or stretch-and-folds) is crucial. A well-developed dough is elastic and extensible, capable of stretching thinly without tearing. This elasticity is what allows the surface of your loaf to expand dramatically in the oven’s steam, setting up that thin, crisp crust. An underdeveloped dough, conversely, will be dense and tear easily, leading to a thicker, chewier crust that can’t achieve that delicate crispness.
Actionable Insight: Use bread flour or a blend that includes a good percentage of bread flour, especially for loaves where a crisp crust is paramount. Pay attention to dough development: aim for a strong windowpane test (where you can stretch a small piece of dough thin enough to see light through it without tearing). Don’t rush fermentation; a longer, slower cold proof can also help develop a more complex gluten structure and richer flavor, both of which contribute indirectly to a better crust. Understand that investing time in dough development will pay dividends in every aspect of your finished loaf, especially the crust.
Frequently Asked Questions
Q: My crust is hard and thick, not thin and crisp. What’s wrong?
A: A hard, thick crust often indicates insufficient steam during the initial bake. Without steam, the outer layer of the dough dries and sets too quickly, restricting oven spring and leading to a dense, tough crust. Ensure you’re creating a steamy environment (Dutch oven, water pan, or spraying) for the first 15-20 minutes of baking.
Q: My crust is crispy right out of the oven, but gets soft within an hour. Why?
A: This is usually due to improper cooling. When the bread is hot, moisture from the interior continues to migrate outwards. If the bread is cooled on a solid surface or cut too soon, this moisture gets trapped, re-softening the crust. Always cool your loaf completely (1-2 hours) on a wire rack to allow full air circulation and moisture evaporation.
Q: Is a high oven temperature really necessary for a good crust?
A: Yes, absolutely. High temperatures (typically 450-500°F / 230-260°C) are crucial for several reasons: they maximize oven spring, accelerate the Maillard reaction and caramelization for deep color and flavor, and effectively drive off residual moisture from the crust in the later stages of baking, ensuring crispness.
Q: Can I get a good crust with a low-hydration dough?
A: It’s more challenging. Low-hydration doughs tend to produce a denser crumb and a thicker, chewier crust. While you can still achieve some crispness with proper steam and high heat, a higher hydration dough generally contributes to a thinner, more shatteringly crisp crust due to better internal aeration and more moisture available for steam generation from the dough itself.
Q: What’s the best way to store homemade bread to keep the crust crisp?
A: Unfortunately, maintaining a super crisp crust on homemade bread for more than a few hours is difficult due to moisture migration from the interior. For immediate consumption, store it uncovered at room temperature once fully cooled. For longer storage (beyond a day), storing in a paper bag or a bread box will help preserve the crust better than plastic, which traps moisture. For truly long-term storage, slice and freeze the bread, then reheat slices in a toaster or oven to revive some crispness.
Achieving that elusive bakery-quality crust at home might seem daunting, but it’s entirely within your reach. It’s not a single magic trick, but rather a combination of understanding the science behind bread and applying a few key techniques consistently. From prioritizing steam to perfecting your cooling process, each step builds on the last to create a loaf that’s not just delicious, but truly spectacular. So, go forth, experiment with these pro-secrets, and prepare to be delighted by the sound of a perfectly crusty, homemade loaf.
Written by Sarah Ellison
Home efficiency, decluttering, and mindful living
A former lifestyle editor with a keen eye for practical home solutions and personal organization.
You Might Also Like

Why Your DIY Smart Home Routines Feel More Like a Chore (And What Actually Works for Real Convenience)
Are your smart home routines more frustrating than convenient? Discover why common DIY approaches fail and learn what truly creates effortless automation.
Why Your Home Still Feels Stuffy (Even After Opening Windows) — And What Actually Works for Real Freshness
Discover why opening windows isn't enough for true home freshness and learn the counter-intuitive strategies that deliver lasting air quality. By Sarah Ellison.

Why Your Home Still Feels Stale (Even After Cleaning) — And What Actually Works for Real Freshness
Ever wonder why your home still smells stale after a deep clean? Learn the hidden culprits and lasting solutions for true freshness.